
Quickstart
Use this the first time you open Mail Alert. Setting up takes about fifteen minutes; after that, daily use is just the two steps under "Daily use".
Set up the store (once)
-
Install
Install Mail Alert from the store. Allow camera access when asked — the camera is how mail is scanned.
-
Enter your community details
Open Settings and enter your locality, state, and postcode. Add any common misreads for your local street and place names — these teach the scanner your community.
-
Set a staff PIN
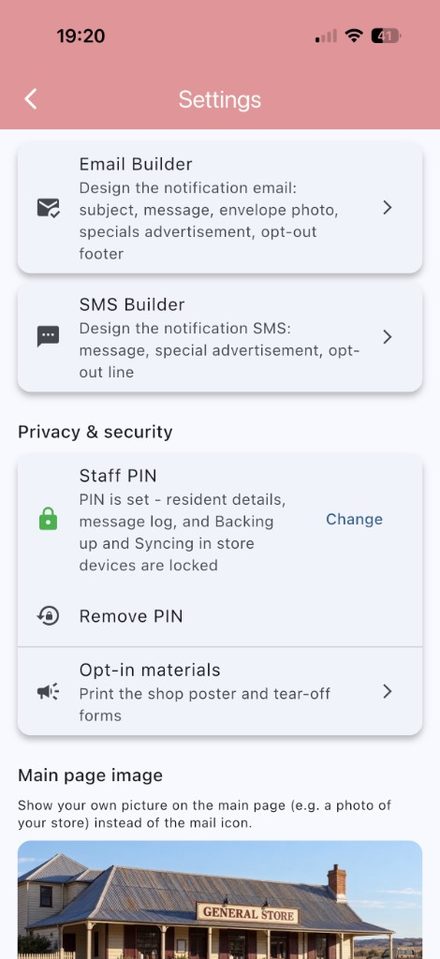
In Settings → Privacy & security, set a PIN. The resident list, message log, and Backing up and Syncing in store devices are then locked — anyone picking up the phone can't browse residents' details. Scanning stays PIN-free.
-
Choose how alerts are sent
In Settings → Resident alerts, pick an email method and an SMS method. Free and simple: "Open mail app" / "Open SMS app" — the phone's own apps open with the message ready, staff tap Send. Fully automatic: the shop's own email account (SMTP, e.g. Gmail with an app password) and/or an SMS gateway account such as ClickSend (pay per message).
-
Decide on review
Leave Review before sending on to start with — every alert shows a preview with Cancel/Send, email first, then SMS. Once you trust what goes out, switch review off in Settings and alerts send themselves; the match screen still shows what happened.
-
Design your messages
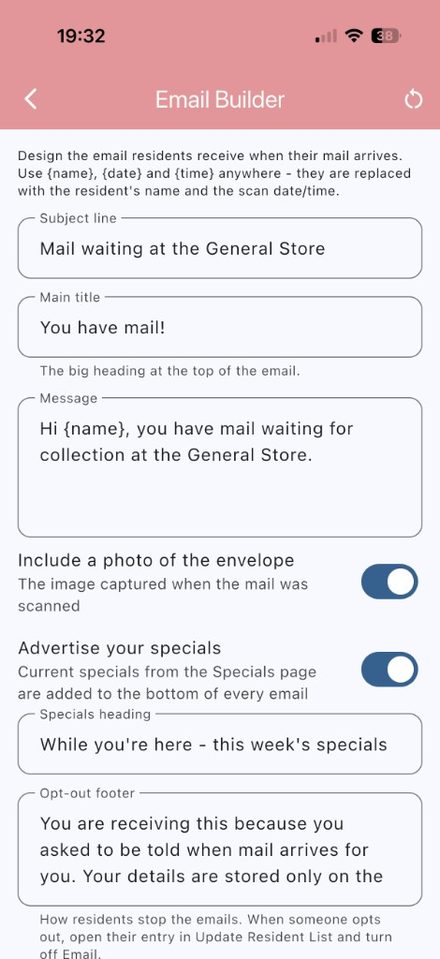
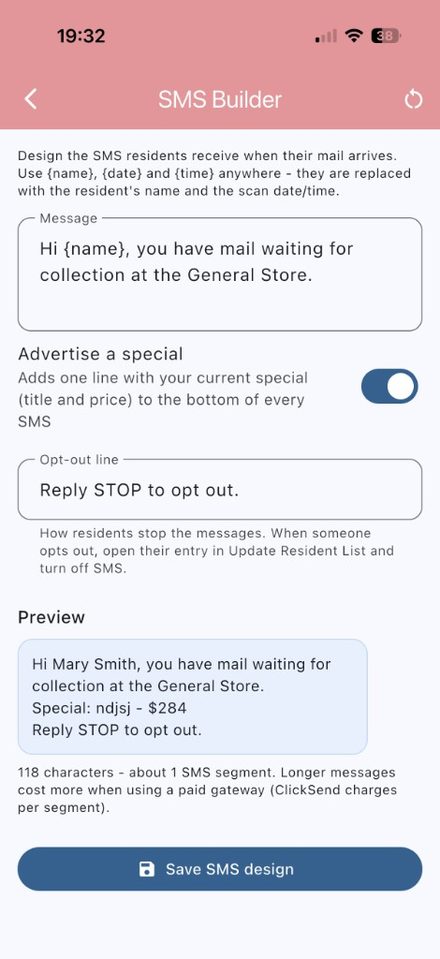
Open the Email Builder and SMS Builder from Settings. Sensible wording is already filled in — adjust the subject, title, and message ({name}, {date}, and {time} are replaced automatically), choose whether the envelope photo and your shop specials ride along, and check the live preview.
-
Add residents as they opt in
Open Update Resident List. For each resident: name, the email and/or mobile they want alerts on, and two searchable lines by default — the name (filled in for you) and a blank line for the address as it appears on their mail. Add extra name variations if you need them. At the bottom of the form, Exclude is optional: put a previous occupant's name there when people have moved in. Print the shop poster and tear-off forms from Opt-in materials. Show them the Privacy Information page if they want the live ticks — the same points are already on the form.
Daily use
-
Scan the mail
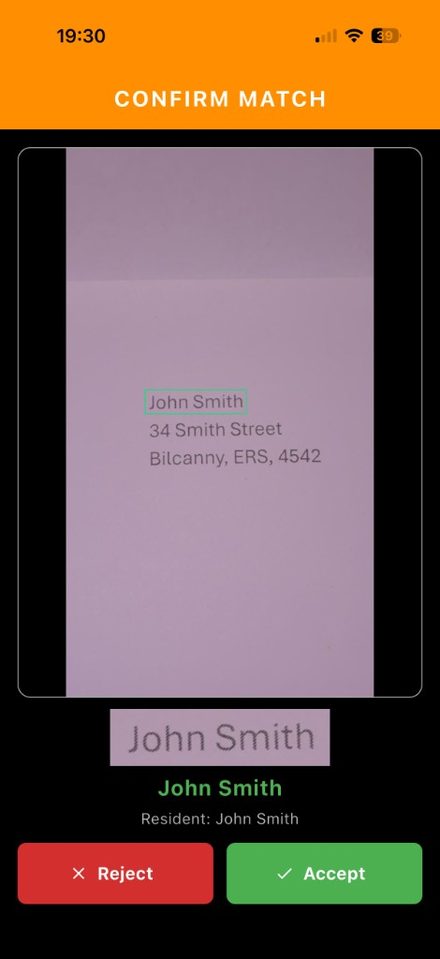
Open Scan Mail and hold each envelope in the frame. The border around the picture is orange while the camera is moving and turns green when it's steady and reading — reading pauses during movement so a passing blur can't set off a false alarm. Use zoom and the camera light for small or gloomy print. A local address flashes NEXT (or your secondary phrase, e.g. PO BOX). If the address matches a resident but their Exclude text is also on the mail, it flashes OLD instead — leftover mail for someone who has moved, which may need to go back to sender, and no alert is sent. On a current-resident match you'll see the envelope photo with the matched words boxed: press Accept to send the alert (review first if you've turned that on) or Reject if it isn't right — either way you're straight back to scanning the next item.
-
Backing up and Syncing in store devices.
Staff using more than one store phone? When Settings shows a badge of changes not yet on other devices, tap Backing up and Syncing in store devices. On the other phone, open the file with Mail Alert. No personal information can be exported from this app. Backing up and syncing between store devices is done using high security encryption. The resident list can never be opened outside the app. Newer entries win, new entries are added, nothing is deleted.
Then
- Training a new staff member? Switch on No-send testing mode in Settings — they can practise scanning and accepting matches with a clear "testing" banner on screen and nothing is ever sent.
- Someone asks "why didn't I get a message?" — open Message Log, search their name, and show them exactly what was sent and when.
- Post your Specials — they appear as a friendly advertisement at the bottom of every alert email.
- A resident wants out? Open their entry in Update Database and switch off Email or SMS — or remove them entirely.
- Someone new has moved in and old names keep arriving? Edit the new resident and put the previous occupant's name in Exclude. Those envelopes flash OLD and the new resident is not alerted.
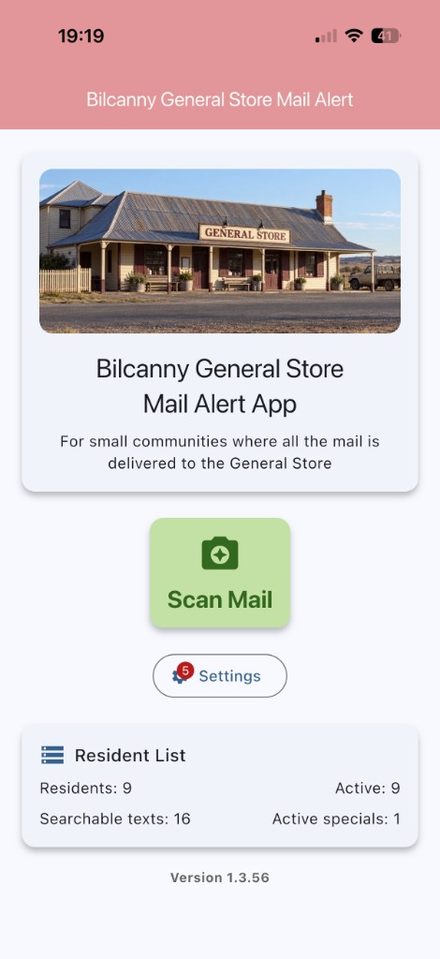
- Make it yours: set a photo of your store on the main page from Settings.